
This will hopefully finish up the details of the sofa project. I would like to say that I've been enjoying my sofa in my living room for about a week or so and I love it!
Here is the layer of horsehair, pretty odd right? The burlap around the edge is called edge roll, I think. It helps to shape the edges and make them solid. Thank goodness I didn't have to remake this, I have no idea how it was done!
I loosely stapled this layer on around the edges, just to hold it till the next layer was put on.

The cotten layer, again just stapled it on enough to hold.

And the dacron! The dacron is in a sheet which gives it a nice, smooth, uniform look.

In these pictures I'm trying to arrange the back fabric. (Even though the original sofa had side seams on the back, I thought I could use one, solid piece of fabric. Boy, was I wrong!!)
The inside corner was at such an angle that there was no way I could stretch the fabric smooth.
My husband told me it wouldn't work, but I'm stubborn and had to find out the hard way!

I had to remove it, remeasure and sew these seams a few times to get it right, and even so, it was very challenging to get these inside corners smooth.
I'm sure it was luck that they turned out so well, I'm learning that sewing isn't my strong point!


This was my "Hallelujah" moment!

I guess I didn't get pictures of putting on the layers of the outside back. Here's what I did: Stretched and stapled scrap fabric tightly to the back. Then stapled the layer of dacron on top of that. I then just wrapped my layer of fabric and pinned it on. I worked from the middle stapling closely to keep it smooth. And then I trimmed it.
This was the easiest part of the whole project!!


This is me trying to sew on my Mother's commercial machine. It was quite scary - like learning to drive stick-shift. The presser foot was extremely sensitive and I nearly sewed my fingers to the cord several times! It eats up the fabric!!
By the way, check out the child carvings on the base of the machine! I think we all carved our initials but, my little brother Stephen?!! what's up with the swastika? I mean really!!
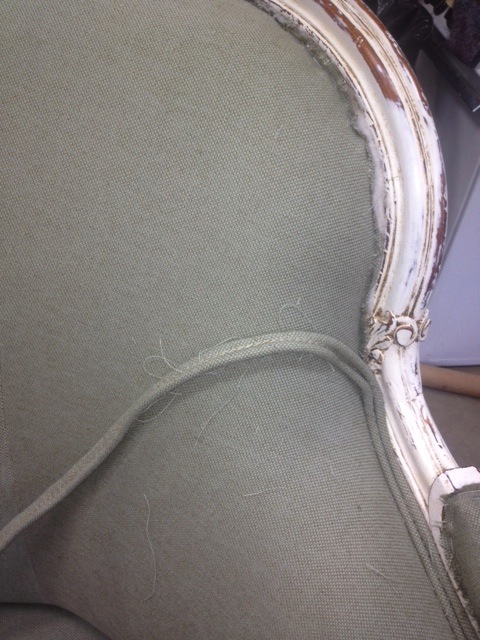
But what was great about it was that the underside of the foot has these two grooves that the cord stays in, making a much more uniform double cord.

I hot-glued the cord to the sofa.
This fabric raveled rather badly so I had to spend a lot of time trimming threads at the end.

I also went to my Mother's for help with the cushion. It was down, which I loved but it would go flat fast and get uncomfortable when we sat on it. We used 2" foam, (which she happened to have - love that!) and I put it in the new form that I made. (same size as the old) The form fabric is actually drapery lining, I got it at my Local fabric store.
We put the foam in and then loaded the old down in around it. This is probably not the correct way but it did turn out great!
It made a huge mess, though.


It's snowing in September!!

My Mother suggested putting a zipper in the down form and I'm glad we did - the down has settled a lot and I may have to add more.
This is my Mother sewing the cushion. I love this picture because it reminds me of all those years that she and my dad spent trying to make a living, sacrificing to provide for us.
She has spent so many long hours turning out furniture. For me it's just a project, but she would upholster a chair in a day, a couch maybe in a couple days. Just trying to pay the bills and put food on the table.
This project brought back so many childhood memories, the sound of the staple gun, the sound of the machine, how we would run out to the shop barefoot and rarely get tacks in our feet. I still don't know why :)

The last step was to put cambric on the bottom. This looks and feels very much like interfacing.
It isn't woven so if you stretch it too hard it will tear. But otherwise, it was easy to put it on.


And... finally done! What a relief!

I want to thank my husband for helping me through every step of this project!
He let me use his awesome shop space, bought me a staple gun, completely disassembled the frame, glued and re-assembled it, helped me haul the sofa around, and most of all, he was supportive and impressed with what I had done. (which meant so much)
And my Mother, she gave of her time and ability so readily. She's the kind of mother that would do anything for her children, I hope to learn from her example with my own children. I am blessed!!
The fabric came from UFAB, a local store that is, I think, quite wonderful. Their prices are much lower than many others and the staff is very helpful. If you are local, I would definitely recommend!
Thanks, you all for all your kind, encouraging comments!! It meant so much! I hope this can be helpful for anyone trying to sum up the courage for a project of their own!
I'm sure you are ready, as I am, to see something else other than a sofa on this blog!
Bye now,
-Melissa
Love the photo of you Momma sewing your cushion!!! And I am envious of her machine!!! You should be SO proud of your sofa project. It is so much work but how awesome to see it in your home and KNOW that you did that. It is just a beautiful piece of furniture and will have many more years of use now....
ReplyDeleteWow! Such a great job! I'll know who to call for my next upholestery project. I can definitely relate to all the nostalgic memories that it brings back.I think I would enjoy being able to do basic projects, just not for a living. I'm glad Mom can pass on some of her skills. I was thinking how much Mom fits the description of Prov. 31. What a great mom!
ReplyDeleteI too remember their shop with tall tables and furniture sitting on them!! Wasn't it in a red barn...I happen to be partial to red barns:) It looks great!!!
ReplyDeleteThe sofa looks so beautiful. No wonder hubby is so proud of you, you are pretty amazing. I'm sure your wonderful mom should get a lot of the credit for the cappable woman (and great Mom) that you are.
ReplyDeleteAnnie
Wow what a beautiful job...wish it were mine...love newly upholstered furniture...love the restoration process...cool
ReplyDeleteThanks for all of the steps! I did read it all :) So sweet that you're working with your mom! Happy New Year!
ReplyDeleteBeautiful! I love your attention to detail and the fact you worked with your mom - so sweet! Thanks for sharing (I did read the entire thing!) and Happy new Year! -- Pauline
ReplyDeleteReally beautiful, absolutely love the fabric and the paint on the frame. Great job!
ReplyDelete